
Creating a custom leather dog collar may seem like a complex task, but with the right guidance, it’s a rewarding and achievable project.
As we take you through the seven simple steps to craft your own durable and stylish collar, you’ll find that the process is both practical and enjoyable.
The end result will not only be a unique accessory for your furry friend but also a testament to your craftsmanship.
So, let’s get started on this journey of creating a personalized collar that both you and your canine companion will cherish.
Table of Contents
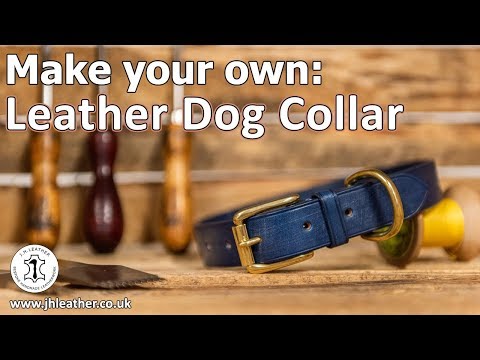
Related Video: "Make Your Own: Leather Dog Collar - Beginner Tutorial" by J.H.Leather
Main Points
– Choosing high-quality materials and tools is essential for making a durable leather dog collar.
– Accurate measuring and cutting of the leather strip is crucial for a perfect fit.
– Precision and attention to detail are important when punching holes for the buckle and rivets.
– Selecting durable and rust-resistant hardware that complements the leather is necessary for a long-lasting collar.
Gather Materials and Tools

Gathering materials and tools for making a leather dog collar requires selecting high-quality leather, a buckle, rivets, a leather punch, and a cutting tool.
When choosing the right leather, it’s important to consider the thickness and durability. Look for full-grain or top-grain leather as they’re sturdy and will withstand wear and tear.
Finding the right tools is essential for crafting a sturdy and professional-looking collar. A leather punch is necessary for creating holes for the buckle and rivets, while a cutting tool ensures clean and precise edges.
Additionally, rivets and a buckle are crucial for securing the collar around the dog’s neck. It’s important to ensure that all materials and tools are of high quality to guarantee the durability and strength of the collar.
Measure and Cut the Leather Strip

First, we measure the leather strip to ensure it fits the dog comfortably.
Then, we carefully cut the leather to the appropriate length, keeping safety in mind.
Once the leather is measured and cut, we can move on to the next step in creating the dog collar.
Measure the Leather
We carefully measured the leather strip to ensure it was the correct length for the dog collar.
Measuring accuracy was crucial to guarantee the collar fit our dog perfectly. We used a flexible measuring tape to wrap around our dog’s neck, and then added an extra inch for comfort. It’s important to consider the leather thickness when measuring as well. Thicker leather will require additional length to accommodate the buckle and ensure a secure fit.
Once we had the accurate measurement, we used a sharp utility knife to cut the leather strip. Ensuring a straight and clean cut was essential for the collar’s overall appearance.
With the leather strip accurately measured and cut, we were ready to move on to the next step in crafting our dog’s stylish and comfortable collar.
Cut the Leather
After accurately measuring the leather strip, the next step is to cut it to the correct length for the dog collar.
Before cutting the leather, ensure that it’s well-prepared by cleaning and conditioning it. This will help in maintaining the quality of the leather and ensuring a clean cut.
When cutting the leather, it’s essential to maintain the sharpness of the cutting tool. Regularly sharpen and lubricate the cutting tool to prevent it from snagging or tearing the leather.
Additionally, always use a cutting mat to protect the work surface and ensure precise cuts.
Measure twice and cut once to avoid any mistakes, as leather can be unforgiving when it comes to errors.
Punch Holes for the Buckle and Rivets

Carefully align the buckle and rivets on the leather strip before punching the corresponding holes using a leather hole punch tool. This step is crucial in ensuring that the collar is securely fastened and durable. The leatherworking techniques and tools used in this process require precision and attention to detail. Here’s a visual representation of the alignment before punching the holes:
| Buckle | Rivets |
|---|
Add Hardware to the Collar

To attach the hardware to the collar, thread the buckle and rivets through the corresponding holes and secure them firmly in place. This step is crucial to ensure the durability and functionality of the collar.
Here are some tips to guide you through the hardware installation and collar customization process:
– Choose the Right Hardware: Select hardware that complements the leather and suits the size of the dog. Durable and rust-resistant hardware is essential for longevity. Consider stainless steel or brass hardware for a stylish and long-lasting finish. Ensure the hardware matches the width and thickness of the leather to guarantee a secure and comfortable fit for your pet.
– Utilize Proper Leatherworking Techniques: When securing the hardware, use a mallet or rivet setter to firmly fasten the rivets. This ensures that the hardware is securely attached to the collar. Apply even pressure when setting the rivets to avoid any weak spots in the collar. Double-check the placement of the hardware before securing it to the leather to prevent any mistakes that could compromise the collar’s integrity.
Stitch the Collar Together

Using a waxed thread, carefully stitch the two leather pieces together along the edges, ensuring a tight and secure bond. When stitching leather, it’s crucial to use proper techniques to ensure the collar’s durability and longevity.
One of the most common stitching techniques used in leatherworking is the saddle stitch, which creates a strong and attractive seam. To achieve this, start by threading the waxed thread through the two pieces of leather, leaving a small tail at the beginning. Then, cross the threads over each other, pulling them tight to create a secure first stitch.
Continue alternating the stitching pattern, always pulling the thread taut to maintain even tension. When you reach the end, tie off the thread with a secure knot and trim any excess. Additionally, leatherworking tips suggest using a stitching awl to create evenly spaced stitch holes and ensure precision in your work.
Remember to take your time and pay attention to detail to create a beautifully crafted and sturdy leather dog collar.
Burnish and Finish the Edges
Alright, let’s talk about the next steps in finishing our leather dog collar.
First, we’ll cover the edge burnishing technique, which gives the collar a professional, polished look.
Then, we’ll move on to applying the leather finish to protect the edges and enhance the overall appearance.
Edge Burnishing Technique
We can achieve a polished and professional look by burnishing and finishing the edges of the leather dog collar.
To master the edge burnishing technique, follow these steps:
– Prepare the Edges: Before burnishing, ensure that the edges are smooth and free from any roughness or unevenness. This can be done using sandpaper or a sharp knife.
– Use a Burnishing Tool: Select a suitable burnishing tool, such as a bone folder or wooden slicker, and apply even pressure along the edges to smooth out any imperfections.
– Apply Edge Finish: After burnishing, apply a leather edge finish to seal and protect the edges, giving them a glossy and professional appearance.
Applying Leather Finish
To achieve a polished and professional look, the next step after mastering the edge burnishing technique is to apply a leather finish to the collar, ensuring the edges are sealed and protected while giving them a glossy and professional appearance. Before applying leather dye, it’s essential to choose the right leather thickness for the collar to ensure durability and a quality finish. Once the leather dye is chosen, carefully apply it to the edges using a wool dauber or a small brush, ensuring even coverage. After the dye has dried, use a burnishing tool to smooth the edges further. Finally, applying a leather finish will seal the edges, protecting them from wear and tear while providing a glossy and professional appearance.
| Applying Leather Finish | ||
| Steps | Materials | Tips |
| Apply leather dye evenly to the edges | Leather dye, wool dauber or brush | Ensure even coverage |
| Use a burnishing tool to smooth the edges | Burnishing tool | Apply gentle pressure |
| Apply a leather finish to seal and protect the edges | Leather finish, cloth | Use a circular motion for even application |
Attach the Leash Ring
Secure the leash ring to the collar by threading the leather through the ring and stitching it in place. This step is crucial for ensuring a strong leash attachment and enhancing collar durability. To properly attach the leash ring, follow these simple steps:
– Thread the Leather Through the Ring:
– Take the end of the leather strap and feed it through the leash ring.
– Pull the leather through until there’s an equal amount of strap on each side of the ring.
– Ensure that the leather isn’t twisted as it passes through the ring.
– Stitch the Leather in Place:
– Use a sturdy needle and strong thread to stitch the leather around the ring.
– Make several passes through the leather and around the ring to create a secure attachment.
– Knot the thread tightly and trim any excess to give the collar a clean finish.
– Test the Strength of the Attachment:
– Once the leash ring is secured, gently tug on the collar to ensure that the ring is firmly attached.
– Check for any signs of stitching coming loose or leather slipping to guarantee the durability of the attachment.
Following these steps will ensure a reliable leash attachment and a long-lasting leather dog collar.
Frequently Asked Questions
Can I Use a Different Type of Leather for the Collar, or Does It Have to Be a Specific Type?
We can use different leather types when customizing designs for a dog collar. Choosing leather is important, but alternative materials can also work. It doesn't have to be a specific type, as long as it's durable and safe for the pup.
What Size Buckle and Rivets Should I Use for Different Sizes of Dog Collars?
When choosing the right hardware for different sizes of dog collars, proper sizing is key. We use sturdy buckles and rivets to ensure collar strength and durability. It's important to match the hardware size with the collar dimensions.
Is It Possible to Add a Personalized Nameplate to the Collar, and How Would I Do That?
Yes, it's possible to add a personalized nameplate to the collar. We can use different leather types for the nameplate, such as veg-tanned or oil-tanned leather. It's a great way to customize the collar for your dog.